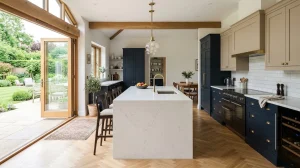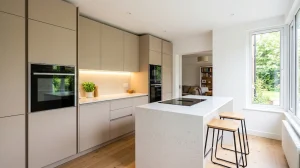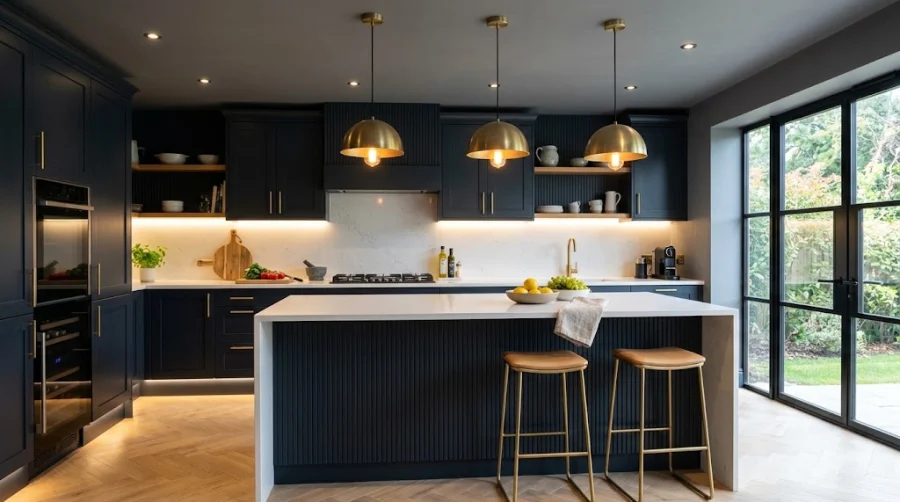
A well-designed kitchen requires more than premium cabinetry, durable quartz worktops, and integrated appliances. Without a carefully planned lighting scheme, even the most luxurious kitchen can feel dark, flat, and difficult to work in.
Because the modern kitchen functions as a culinary workspace, a family dining area, and an evening entertainment hub, lighting must deliver both functional clarity for food preparation and warm ambient atmosphere for socialising.
Whether you are renovating an open-plan kitchen in Wolverhampton, updating a classic shaker layout in Dudley, or planning a contemporary handleless space in South Staffordshire, this guide explains the principles of layered lighting, critical technical specifications, pendant hanging rules, and smart control setups.
The Three Essential Layers of Kitchen Lighting
Professional lighting designers use a three-tier layered approach to ensure every zone of the kitchen is properly illuminated without creating glare or dark shadows.
+-----------------------------------------------------------------------------------------+
|                               The 3 Layers of Kitchen Lighting                          |
+--------------------------+-----------------------+--------------------------------------+
| Layer                    | Primary Purpose       | Common Fixtures & Locations          |
+--------------------------+-----------------------+--------------------------------------+
| 1. Task Lighting         | High-intensity light  | • Under-cabinet continuous LED strips|
| (Focused Work Light)     | for food prep & cook  | • Directional downlights above sinks |
|                          |                       | • Integrated cooker hood lighting    |
+--------------------------+-----------------------+--------------------------------------+
| 2. Ambient Lighting      | General background    | • Recessed ceiling LED downlights    |
| (Overall Illumination)   | light for navigation  | • Flush architectural ceiling panels |
|                          |                       | • Central feature chandeliers        |
+--------------------------+-----------------------+--------------------------------------+
| 3. Accent Lighting       | Decorative depth,     | • Feature island pendant lights      |
| (Mood & Drama)           | warmth & visual focus | • Plinth / toe-kick LED floor strips |
|                          |                       | • Internal glass cabinet backlights  |
+--------------------------+-----------------------+--------------------------------------+
Technical Lighting Metrics: Kelvins, Lumens & CRI
Selecting the correct bulb specifications prevents your kitchen from looking either too orange or clinical and sterile.
+-----------------------------------------------------------------------------------------+
|                           Kitchen Technical Lighting Benchmarks                         |
+--------------------------+-----------------------+--------------------------------------+
| Lighting Metric          | Recommended Standard  | Why It Matters in a Kitchen          |
+--------------------------+-----------------------+--------------------------------------+
| Colour Temperature (K)   | 2700K – 3000K         | 2700K (Warm White) for mood/dining;  |
|                          | (Warm to Soft White)  | 3000K (Soft White) for crisp tasking |
+--------------------------+-----------------------+--------------------------------------+
| Colour Rendering (CRI)   | CRI 90+               | High CRI ensures fresh food & stone  |
|                          |                       | worktop colours appear natural       |
+--------------------------+-----------------------+--------------------------------------+
| Task Area Illumination   | 400 – 500 Lux         | Optimal brightness on chopping boards|
+--------------------------+-----------------------+--------------------------------------+
| Ambient Area Level       | 150 – 250 Lux         | Comfortable overall room light level |
+--------------------------+-----------------------+--------------------------------------+
Why 4000K+ Should Be Avoided in Residential Kitchens
Cool white lighting (4000K to 6000K) is common in commercial kitchens and offices but creates an uninviting, clinical glare in home environments. A 3000K warm-to-neutral white provides optimal visibility for food preparation while preserving the warm, welcoming feel of your living space.
Placement Rules: Kitchen Island Pendants & Downlights
Improper fixture placement is the leading cause of poor kitchen lighting. Below are industry-standard measurements for hanging island pendants and positioning ceiling downlights.
Pendant Hanging Clearances:
[Ceiling] ➔ [Cable] ➔ [Pendant Bottom: 750mm–900mm] ➔ [Worktop Surface]
Precision Hanging Rules for Island Pendants:
- Height Above Countertop: The base of your pendant shades should hang 750mm to 900mm above the finished surface of your kitchen island. This ensures an unobstructed line of sight across the island when standing or seated on bar stools.
- Spacing Between Pendants: Space multi-pendant configurations 600mm to 800mm apart (measured centre-to-centre).
- Edge Inset: Ensure outer pendants sit at least 150mm to 300mm inward from the outer edge of the island worktop to prevent accidental head bumps.
+-------------------------------------------------------------------------+
|                    Pendant Quantity by Island Length                    |
+--------------------------+----------------------------------------------+
| Island Length (Metres)   | Recommended Pendant Configuration            |
+--------------------------+----------------------------------------------+
| 1.2m – 1.8m Island       | 2 Medium Pendants (250mm–350mm diameter)     |
| 2.0m – 2.8m Island       | 3 Medium Pendants or 2 Large Statement Domes |
| 3.0m+ Island             | 3 to 4 Pendants or a Single Linear Suspension|
+--------------------------+----------------------------------------------+
The “Shadow Trap” with Ceiling Downlights
A frequent mistake in kitchen planning is placing ceiling downlights in the middle of walkways. When you stand at the worktop to chop vegetables, light coming from behind your body casts your own shadow directly over your work surface.
- The Correct Rule: Align ceiling downlights directly over the front edge of worktops—typically 400mm to 600mm away from the wall—so light shines directly down onto the food prep area.
Specific Lighting Zones: Where & How to Implement
A. Under-Cabinet Task Lighting (Continuous LED Extrusions)
Individual “puck” lights create uneven pools of light and hot spots on glossy quartz or granite surfaces.
- The Best Practice: Install continuous aluminium LED channel profiles with frosted diffusers along the underside of wall units. This casts an unbroken, shadow-free ribbon of light across your entire worktop.
B. Plinth & Handleless Channel Lighting (Floating Cabinet Effect)
- Plinth (Toe-Kick) LEDs: Installing low-wattage LED tape along the recessed kickboards creates a gentle floor wash, giving heavy kitchen islands and base units a contemporary “floating” appearance.
- Handleless Profile Illumination: In modern handleless kitchens, running hidden micro-LED strips inside the J-pull or true handleless aluminium channels accentuates the cabinetry’s clean architectural lines.
C. Glass-Fronted Cabinet & Open-Shelf Accent Lighting
- Placing warm 2700K recessed mini-spotlights or vertical corner LED profiles inside glass-fronted display cabinets highlights fine glassware, tableware, and ceramics, adding depth to the room during evening hours.
Smart Multi-Zone Switching and Scene Control
A single light switch for an entire open-plan kitchen is inefficient and impractical. To maximize flexibility, divide your lighting into at least three independently switched and dimmable circuits:
+-----------------------------------------------------------------------------------------+
|                              Multi-Circuit Switching Setup                              |
+--------------------------+-----------------------+--------------------------------------+
| Circuit Number           | Dedicated Fixtures    | Function & Usage                     |
+--------------------------+-----------------------+--------------------------------------+
| Circuit 1: Task Lighting | Under-cabinet LEDs &  | Turned on during meal prep, cooking, |
|                          | hob downlights        | and cleanup                          |
+--------------------------+-----------------------+--------------------------------------+
| Circuit 2: Ambient Light | Main ceiling recessed | General navigation, cleaning, and    |
|                          | downlights (Dimmable) | daytime fill light                   |
+--------------------------+-----------------------+--------------------------------------+
| Circuit 3: Feature Accent| Island pendants &     | Kept on low dimming for evening      |
|                          | plinth LED strips     | entertaining and relaxed dining      |
+--------------------------+-----------------------+--------------------------------------+
Smart Scene Presets
Using smart dimmer switches or wireless smart controllers allows you to switch between pre-configured lighting scenes at the press of a button:
- “Cooking Scene”: 100% Task lighting + 80% Ambient downlights.
- “Dining Scene”: Task lighting OFF + Island pendants at 40% + Plinth lights at 30%.
- “Night Mode”: Plinth lights at 10% for low-glare guidance.
Regulatory Standards: UK Building Regulations (Part P)
Kitchen electrical installations involve water sources, high-powered appliances, and heat-generating appliances.
- All new kitchen lighting circuits, socket additions, and fuse board modifications must comply with Part P of UK Building Regulations.
- Ensure all electrical work is carried out or signed off by a certified electrician (e.g., NICEIC or NAPIT registered) who will provide an electrical installation certificate upon completion.
Planning Your Kitchen Renovation in Wolverhampton
A comprehensive lighting layout should always be integrated into your initial 3D kitchen design rather than treated as an afterthought during fitting.
Homeowners across Wolverhampton, Dudley, Walsall, and South Staffordshire can explore working kitchen displays—featuring integrated LED profiles, ambient plinth lighting, and island pendant arrangements—at the Wulfrun Kitchens & Bathrooms showroom on Drayton Street in Wolverhampton.
To see recent kitchen transformations, browse the Recent Projects Portfolio or Book a Free Design Consultation with the design team at Wulfrun Kitchens & Bathrooms.