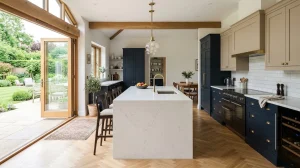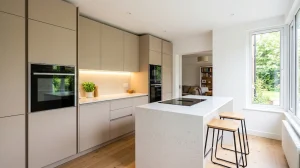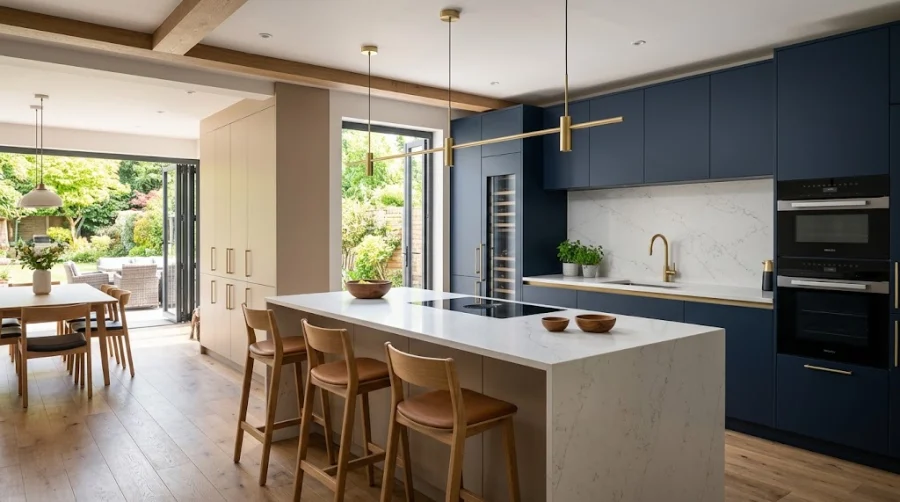
A kitchen renovation is one of the most rewarding home improvement projects you can undertake. It is the culinary engine of your home, the primary gathering space for family meals, and the focal point for evening entertaining.
However, designing a kitchen that balances timeless aesthetics with effortless daily functionality requires careful planning. In Wolverhampton, Dudley, Walsall, and across South Staffordshire—where property styles range from historic Victorian and Edwardian homes to 1930s semi-detached houses and modern open-plan extensions—every kitchen project comes with unique architectural considerations.
This comprehensive planning guide provides a step-by-step roadmap to designing your ideal kitchen, covering layout ergonomics, cabinetry styles, worktop materials, appliance integration, and 3D visualization.
The 7-Step Kitchen Design Roadmap
+-----------------------------------------------------------------------------------------+
|                               The Kitchen Design Process                                |
+----+-----------------------------+------------------------------------------------------+
| Step| Planning Phase              | Key Decisions & Actions Required                     |
+----+-----------------------------+------------------------------------------------------+
| 1  | Lifestyle & Needs Assessment| Define household cooking, dining, and storage habits |
| 2  | Spatial Layout & Ergonomics | Establish the "Working Triangle" and walkway clearance|
| 3  | Cabinetry Style & Finish    | Choose between Shaker, Handleless, or Contemporary   |
| 4  | Worktop Material Selection  | Evaluate Quartz, Solid Compact Laminate, or Granite  |
| 5  | Appliance Integration       | Select built-in vs freestanding appliances & extract |
| 6  | Layered Lighting Scheme     | Plan task, ambient, and accent LED lighting zones    |
| 7  | 3D CAD Design Consultation  | Test clearances, colours, and finishes in 3D visuals |
+----+-----------------------------+------------------------------------------------------+
Step 1: Assess Your Household Lifestyle & Storage Requirements
Before browsing door colours and tile samples, evaluate how your household actually uses the space:
+-------------------------------------------------------------------------+
|                  Lifestyle Assessment Questionnaire                     |
+--------------------------+----------------------------------------------+
| Cooking Habits           | Do you prepare meals from scratch daily, or  |
|                          | do you need quick-reheat convenience zones?  |
+--------------------------+----------------------------------------------+
| Social & Family Dynamics | Do you require a casual breakfast bar for    |
|                          | children, or an open-plan entertainment hub? |
+--------------------------+----------------------------------------------+
| Storage Demands          | Do you need deep pan drawers, tall pull-out  |
|                          | larder towers, or integrated recycling bins? |
+--------------------------+----------------------------------------------+
Step 2: Choose the Optimal Layout & Working Triangle
Your kitchen floor plan dictates how efficiently you move between food preparation, cooking, and cleanup.
          [ Cooktop / Hob ]
             /         \
            /           \
   [ Sink / Wet Zone ] ─── [ Refrigerator ]
- The Working Triangle: The total distance between the sink, cooking hob, and refrigerator should measure between 4.0m and 7.9m, with no high-traffic walkways cutting through the space.
- Walkway Clearances: Maintain a minimum walkway width of 1000mm to 1200mm between opposing cabinet runs or between a kitchen island and perimeter base units to allow multiple people to move freely.
+-----------------------------------------------------------------------------------------+
|                                 Layout Selection Matrix                                 |
+--------------------------+-----------------------+--------------------------------------+
| Layout Style             | Best Suited For       | Key Architectural Benefit            |
+--------------------------+-----------------------+--------------------------------------+
| L-Shaped Layout          | Open-Plan Living      | Seamless flow into dining areas;     |
|                          |                       | easily accommodates a central island |
+--------------------------+-----------------------+--------------------------------------+
| U-Shaped Layout          | Square Rooms (2.7m+)  | Maximises continuous worktops and    |
|                          |                       | perimeter storage capacity           |
+--------------------------+-----------------------+--------------------------------------+
| Galley Layout            | Narrow Rooms (<2.5m)  | High-efficiency workflow with zero   |
|                          |                       | dead corner space (Chef's choice)    |
+--------------------------+-----------------------+--------------------------------------+
Step 3: Select Cabinetry Style and Build Quality
The visual character of your kitchen is defined by its cabinetry profile.
+-------------------------------------------------------------------------+
|                         Popular Cabinetry Styles                        |
+--------------------------+----------------------------------------------+
| Classic Shaker           | Timeless five-piece framed doors; suits both |
|                          | traditional and modern period homes          |
+--------------------------+----------------------------------------------+
| Modern Handleless        | Sleek J-pull or true rail profile doors with |
|                          | clean horizontal lines for minimalist homes  |
+--------------------------+----------------------------------------------+
| Contemporary Flat-Panel  | Smooth slab doors in tactile matt, cashmere, |
|                          | anthracite, or warm natural wood finishes    |
+--------------------------+----------------------------------------------+
The Benchmark for Structural Quality:
- Insist on 18mm rigid-built high-density MFC carcasses with solid 18mm back panels and 2mm impact-resistant PVC protective edging.
- Ensure drawers and hinges feature heavy-duty soft-close mechanisms tested to a minimum of 150,000 cycles.
Step 4: Choose the Right Worktop Material
Worktops endure intense daily contact with heat, sharp knives, and staining liquids. Selecting a resilient material ensures your kitchen stays pristine for decades.
+-----------------------------------------------------------------------------------------+
|                             Worktop Performance Comparison                              |
+--------------------------+-----------------------+--------------------------------------+
| Material                 | Thickness Options     | Performance Characteristics          |
+--------------------------+-----------------------+--------------------------------------+
| Engineered Quartz        | 20mm / 30mm           | Non-porous, highly stain-resistant,  |
| (93% Natural Quartz)     |                       | heat-tolerant, seamless undermounts  |
+--------------------------+-----------------------+--------------------------------------+
| Solid Compact Laminate   | 12mm Slim Profile     | 100% waterproof solid resin core,    |
|                          |                       | ultra-slim modern look, cost-effective|
+--------------------------+-----------------------+--------------------------------------+
| Natural Granite          | 30mm                  | Distinctive natural veining, highly  |
|                          |                       | heat-resistant, requires annual seal |
+--------------------------+-----------------------+--------------------------------------+
Step 5: Appliance Integration and Extraction
Integrated appliances create clean, clutter-free sightlines across your kitchen:
- Induction Hobs with Integrated Downdraft Extraction: Combines powerful cooking with built-in vapor extraction, eliminating bulky overhead chimney hoods and opening up sightlines across kitchen islands.
- Eye-Level Single / Double Ovens: Installing ovens at ergonomic chest height eliminates the need to bend down with heavy roasting dishes.
- Integrated Dishwashers & Combi Microwaves: Concealing dishwashers behind matching cabinet fascias and using built-in combination microwave-ovens frees up vital worktop surface area.
Step 6: Layered Lighting Design
A successful kitchen design requires a three-tier layered lighting plan:
+-------------------------------------------------------------------------+
|                        Layered Lighting Strategy                        |
+--------------------------+----------------------------------------------+
| Task Lighting            | Continuous under-cabinet LED strips over     |
|                          | worktops (3000K soft white, 400–500 Lux)     |
+--------------------------+----------------------------------------------+
| Ambient Lighting         | Dimmable recessed ceiling downlights aligned |
|                          | over worktop edges (400mm–600mm from walls)  |
+--------------------------+----------------------------------------------+
| Accent Lighting          | Feature island pendants (750mm–900mm above   |
|                          | counter) and subtle plinth / toe-kick LEDs   |
+--------------------------+----------------------------------------------+
Step 7: Experience Your Design in 3D & Visit a Local Showroom
Before placing an order or approving a layout, viewing your space in photorealistic 3D CAD visualization is essential:
- Test spatial clearances, walkway widths, and appliance door sweeps.
- Experiment with cabinet colours (such as navy, dust grey, cashmere, or forest green) and worktop textures under realistic lighting simulations.
Visiting a physical showroom—such as the Wulfrun Kitchens & Bathrooms showroom on Drayton Street in Wolverhampton—allows you to inspect full-size working displays, test soft-close drawer mechanisms, and examine material samples in person.
Budgeting & Turnkey Project Management
In the West Midlands, complete bespoke kitchen renovations (including 18mm rigid cabinetry, quartz worktops, integrated appliances, and certified trade installation) typically start from £10,000+.
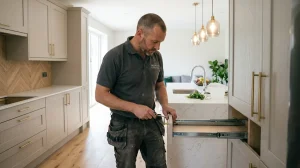
Choosing a turnkey “supply and fit” specialist ensures that plumbing, Gas Safe connections, Part P electrical works, plastering, and worktop templating are coordinated under one roof with a single point of contact and a comprehensive 10-year warranty.
To explore recent kitchen transformations across Wolverhampton, Tettenhall, Wightwick, Dudley, and South Staffordshire, browse the Recent Projects Portfolio or visit the team at Wulfrun Kitchens & Bathrooms.
To start planning your project, Book a Free Design Consultation with the expert design team at Wulfrun Kitchens & Bathrooms.